

ExactFlow Add Orders Page User Guide
The Add Order page is used to create, review, and manage a single order. From here, you can add products, manage payments, update order status, create shipments, and view order history.
How to Open the Add Order Page
Log in to your ExactFlow account.
From the left sidebar menu, click Orders.
Select Orders List.
On the Orders List page, click the + Add Order button.
A pop-up window will appear asking you to:
Create an order for an existing client, or
Create an order for a new client.
Choose the required option.
The Add Order page will open, where you can start creating the order.
-
Page Header (Top Section)
Order Number
-
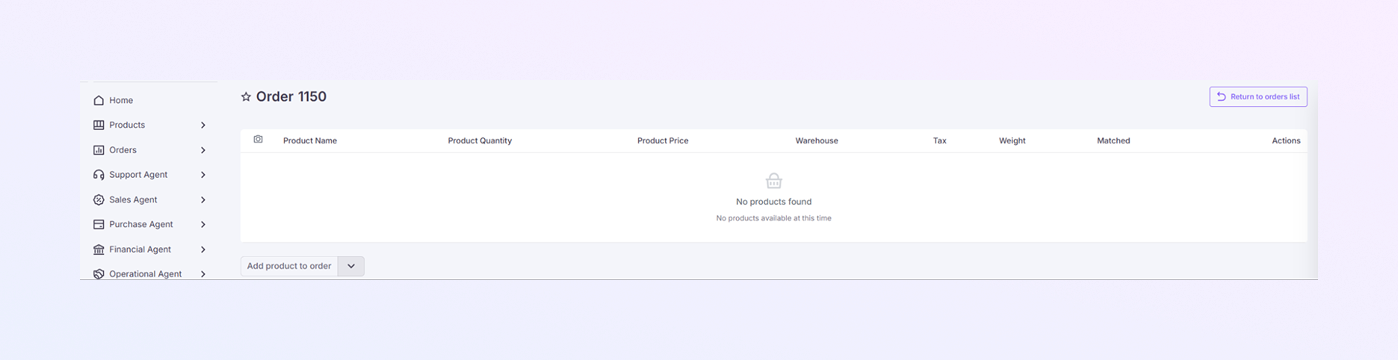
At the top, you will see the Order ID (for example: Order 1149)
-
This is the unique reference number for the order
-
Used for tracking, invoices, and support.
-
Click “Return to orders list.”
-
Takes you back to the Orders List page
Back to Orders List
-
-
Products Section (Order Items)
This section shows products added to the order.
Product Name: Name of the product
Product Quantity: Number of units ordered
Product Price: Price per product
Warehouse: Warehouse assigned for fulfillment
Tax: Applied tax (if any)
Weight: Product weight
Matched: Shows whether the product is matched with inventory
Actions: Edit or remove product
Add Product to Order
Click “Add product to order.”
A pop-up window will open, showing products available in storage.
Select the product you want to add.
Click Save to add the product to the order.
Add Product Manually
Click the down arrow next to “Add product to order.”
Select “Add product manually.”
A pop-up form will appear.
Fill in all required product details (such as name, quantity, and price).
Click Save to add the product to the order.
No Products Added
If no product is added to the order, the message “No products found” will be displayed.
-
Returns Section
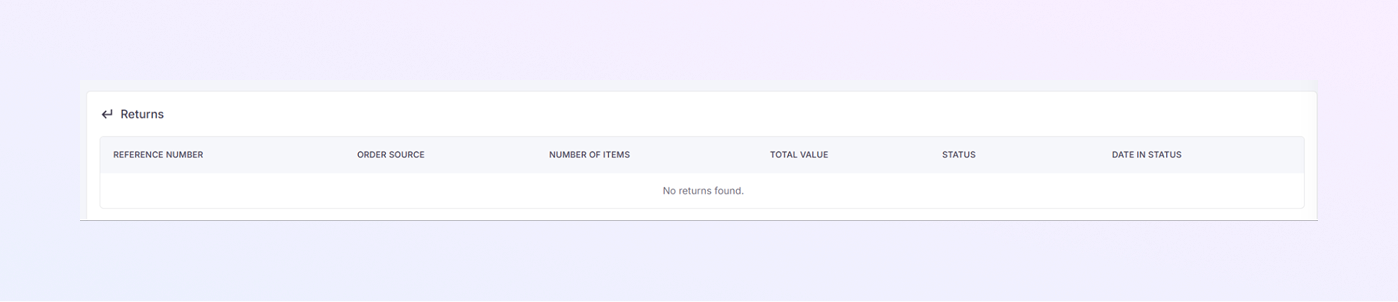
This section displays returns related to the order.
Reference Number: Return reference ID
Order Source: Where the order came from
Number of Items: Items returned
Total Value: Refund amount
Status: Return status
Date in Status: Last update date
If no returns exist, it shows “No returns found.”
-
Order Information Section
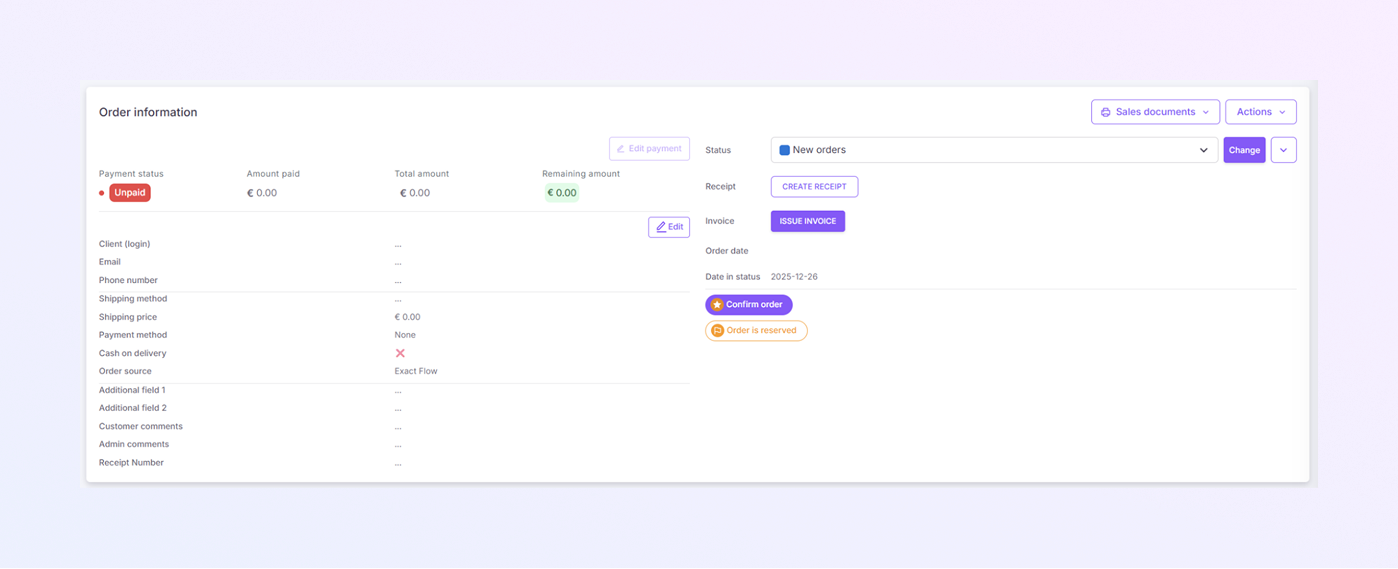
This is the main control panel for the order.
Payment Summary
Payment Status: Example: Unpaid, Paid, Partial
Amount Paid: Total amount already paid.
Total Amount: Full order value.
Remaining Amount: Amount still to be paid.
Payment Actions
Edit Payment: Update payment amount or information.
Create Receipt: Generate a payment receipt.
Issue Invoice: Create an official invoice for the order.
Order Status
Shows current order status (example: New orders)
Click Change to update the order status.
Helps track order progress.
Order Dates
Order Date: Date when the order was created.
Order Status Date: Date of the latest status update.
Status Action Buttons
Confirm Order: Confirms the order for processing.
Order is Reserved: Reserves inventory for this order.
-
Sales Documents & Actions (Right Side)
Sales Documents
-
By clicking on the sales document button, you can print or download purchase orders and product lists in PDF.
Actions Menu
Additional order-related options
May include delete order and create return.
-
-
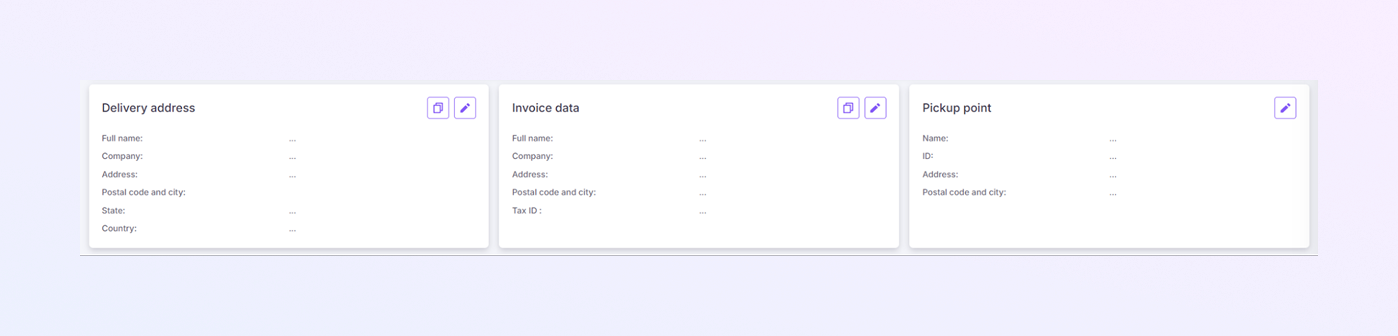
Delivery Address Section
This section stores the customer delivery details.
Fields Included:
Full Name
Company
Address
Postal Code & City
Country
Click the edit icon to update delivery details if needed.
Click the copy icon to copy the address to the invoice data.
-
Invoice Data Section
Used for billing information (may differ from delivery address).
Fields Included:
Full Name
Company Name
Billing Address
Postal Code & City
Tax ID
Click the edit icon to update billing details.
Click the copy icon to copy data to the delivery address.
-
Pickup Point Section
Used when orders are collected from a pickup location.
Fields Included:
Pickup Name
ID
Address
Postal Code & City
Click the edit icon to update the pickup point details.
-
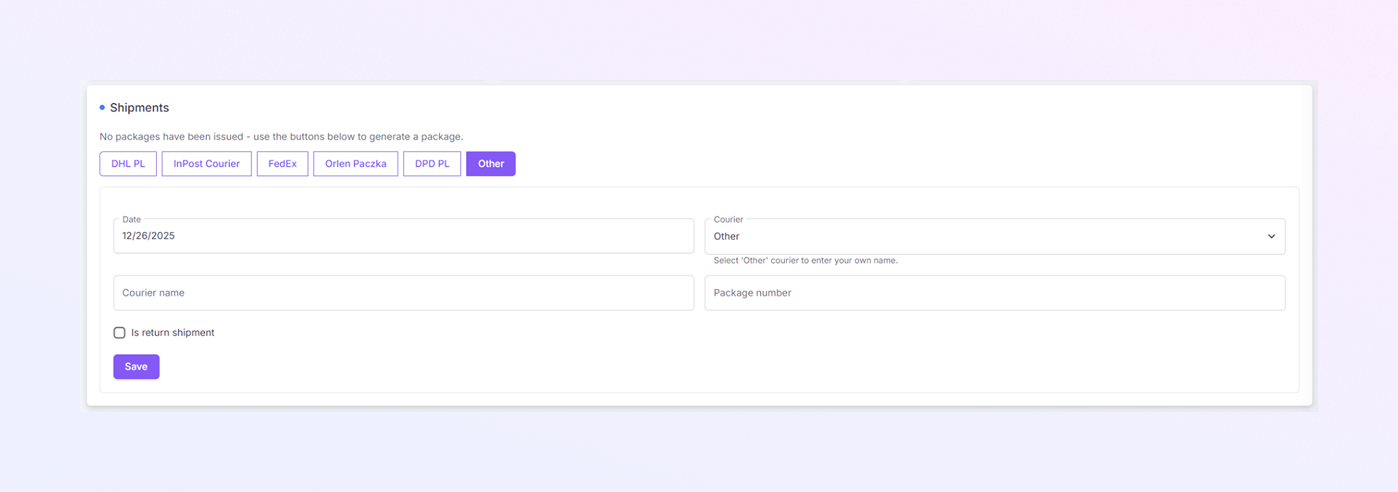
Shipments Section
Used to create and manage shipping details.
Courier Options
Select the courier options from the available Buttons:
DHL PL
InPost Courier
FedEx
Orlen Paczka
DPD PL
Other
Shipment Form Fields
Each courier option opens its own form. After selecting a courier, complete the fields shown for that option.
For example, if you select “Other” as the courier, fill in the following details:
-
Date: Select the shipment date
-
Courier: Choose the courier service
-
Courier Name: Enter a custom courier name (used when “Other” is selected)
-
Package Number: Enter the shipment tracking number
-
Is Return Shipment: Enable this option if the shipment is a return
-
Click Save to create a shipment.
Shipment details are stored with the order.
-
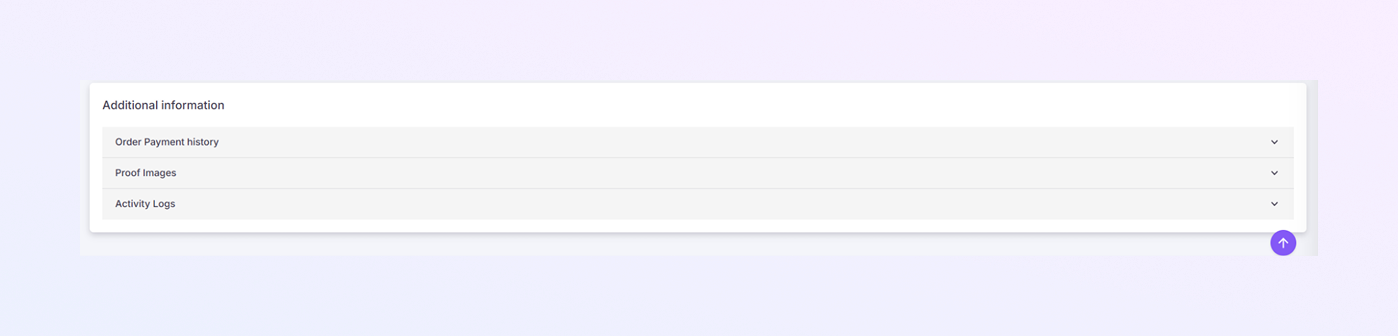
Additional Information Section
This section stores extra order data and history.
Order Payment History
Shows all payment transactions.
Helps track partial and full payments.
Proof Images
Upload or view images related to the order.
Useful for verification or disputes.
Activity Logs
Records all actions taken on the order.
Shows:
Status changes
Payment updates
User actions
Summary
The Add Order page allows you to:
Create and manage orders
Add products and payments
Generate invoices and receipts
Handle shipping and returns
Track full order history
On this page
1.
How to Open the Add Order Pagee
2.
Page Header (Top Section)
3.
Products Section (Order Items)
4.
Returns Section
5.
Order Information Section
6.
Sales Documents & Actions (Right Side)
7.
Delivery Address Section
8.
Invoice Data Section
9.
Pickup Point Section
10.
Shipments Section
11.
Additional Information Section
12.
Summary