

ExactFlow Automatic Action Page User Guide
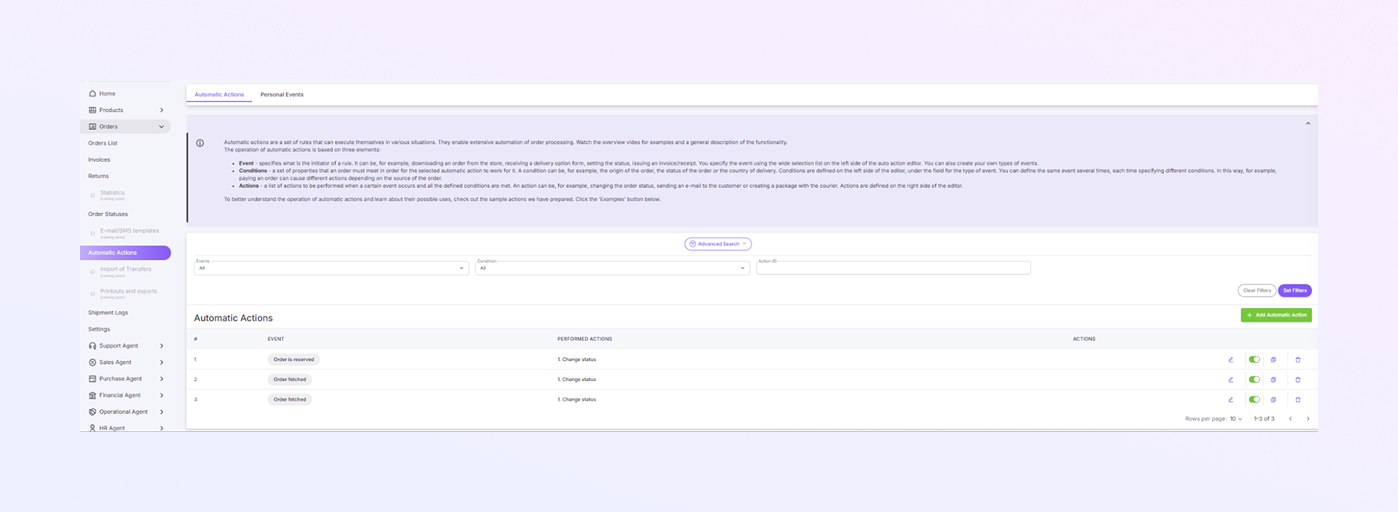
The Automatic Actions page enables you to establish rules that trigger automatic tasks when specific events occur. It helps automate your workflow and can save time by performing actions without manual input. For example, when a specific event occurs (such as an order being fetched), an action can automatically update the order status or trigger another task.
How to Open the Automatic Actions Page
Log in to your ExactFlow account.
From the left menu, click Orders.
Under the Orders section, click Automatic Actions.
The Automatic Actions page will open.
At the top, you'll see two sections: Automatic Actions and Personal Events. These sections help you set up and manage your automatic actions and events.
Automatic Actions Page Overview
This page shows a list of any pre-existing automatic actions. These Fields are displayed:
-
Event
An Event is the action that triggers a process in your system. For example:
-
Order fetched: Triggers when an order is fetched from the system.
-
Order reserved: Triggers when an order is marked as reserved.
-
-
Performed Actions
An Action is what happens automatically when an event occurs and all conditions are met. For example:
-
Change status: Changes the status of an order (e.g., from "Pending" to "Reserved").
-
Manage Existing Automatic Actions
You will see a list of all your existing automatic actions. For each automatic action, you can:
-
Edit: Modify the action by clicking the pencil icon.
-
Activate/Deactivate: Turn the action on or off using the toggle switch.
-
Duplicate: Duplicate the action by clicking the duplicate icon.
-
Delete: Remove the action by clicking the trash icon.
Filter and Search for Automatic Actions
-
You can use the filter options at the top of the page to narrow down the displayed automatic actions. The filters include:
-
Events: Filter by the specific events that trigger actions (e.g., "Order fetched").
-
Condition: Choose specific conditions like "All" or custom conditions.
-
Action ID: Search for specific action IDs.
-
-
After selecting your filters, click Set Filters to apply them and see your filtered results.
Rows per Page
-
Located at the bottom-right corner, this option lets you change how many automatic actions are shown per page.
-
You can select from a default of 10 rows per page.
Add a New Automatic Action
-
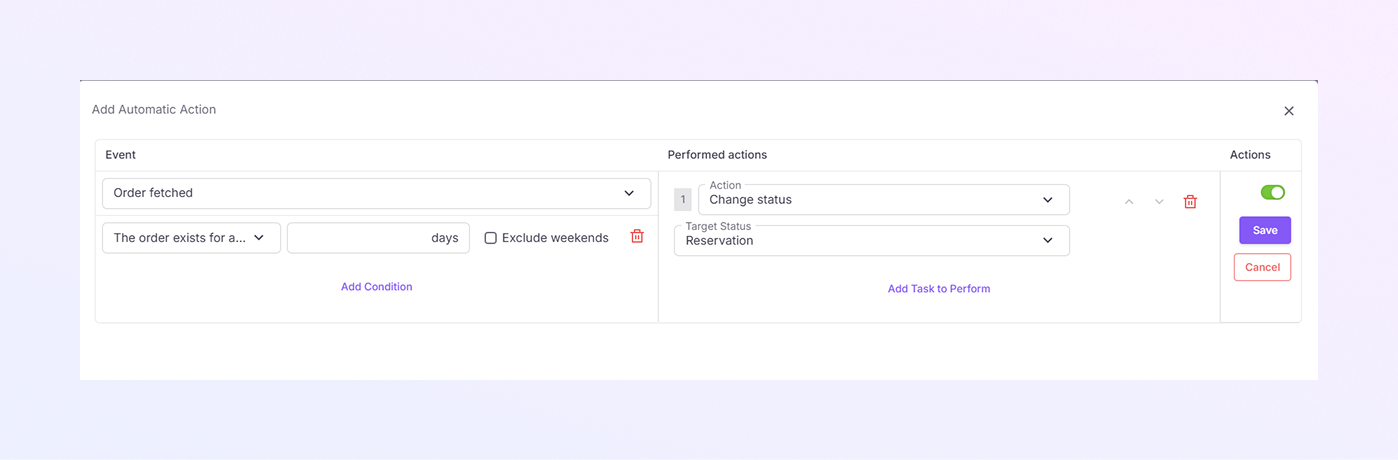
On the Automatic Actions page, click the + Add Automatic Action button (located in the top-right corner).
-
A new window will open where you can set up the action.
Configure the New Action
-
Select an Event: Choose the event that will trigger the action, such as "Order fetched."
-
Set Conditions: Optionally, set any conditions (e.g., exclude weekends or set a number of days).
-
Define Action: Choose what action should be taken, like Change status.
-
Select Target Status: Choose the new status for the order (e.g., Reservation).
-
Once finished, click Save to create the automatic action.
Personal Events Page Overview
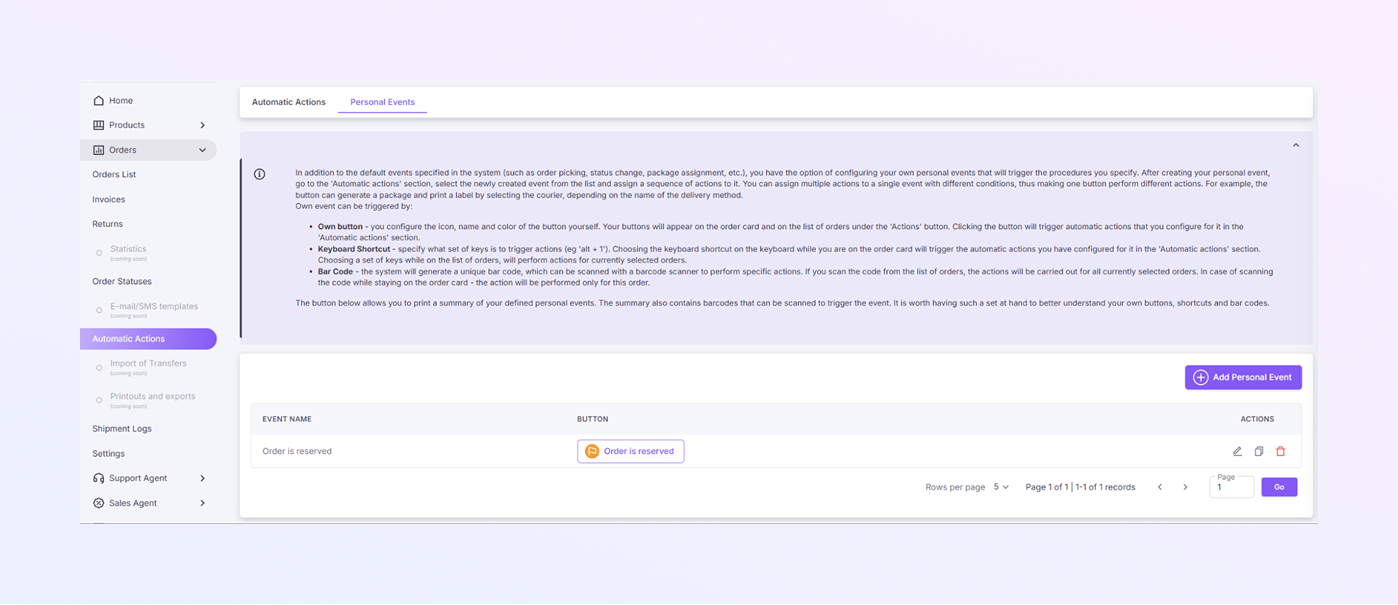
On the Personal Events page, you can create new custom events or manage existing ones. The page will show a list of the events you have already set up. Each event will show:
-
Event Name: The name of the event, such as "Order is reserved."
-
Button: Displays the button associated with the event (if applicable).
For each event, you have several options:
-
Edit: Modify the event settings (pencil icon).
-
Duplicate: Duplicate the event.
-
Delete: Remove the event from your system (trash icon).
Creating a Personal Event
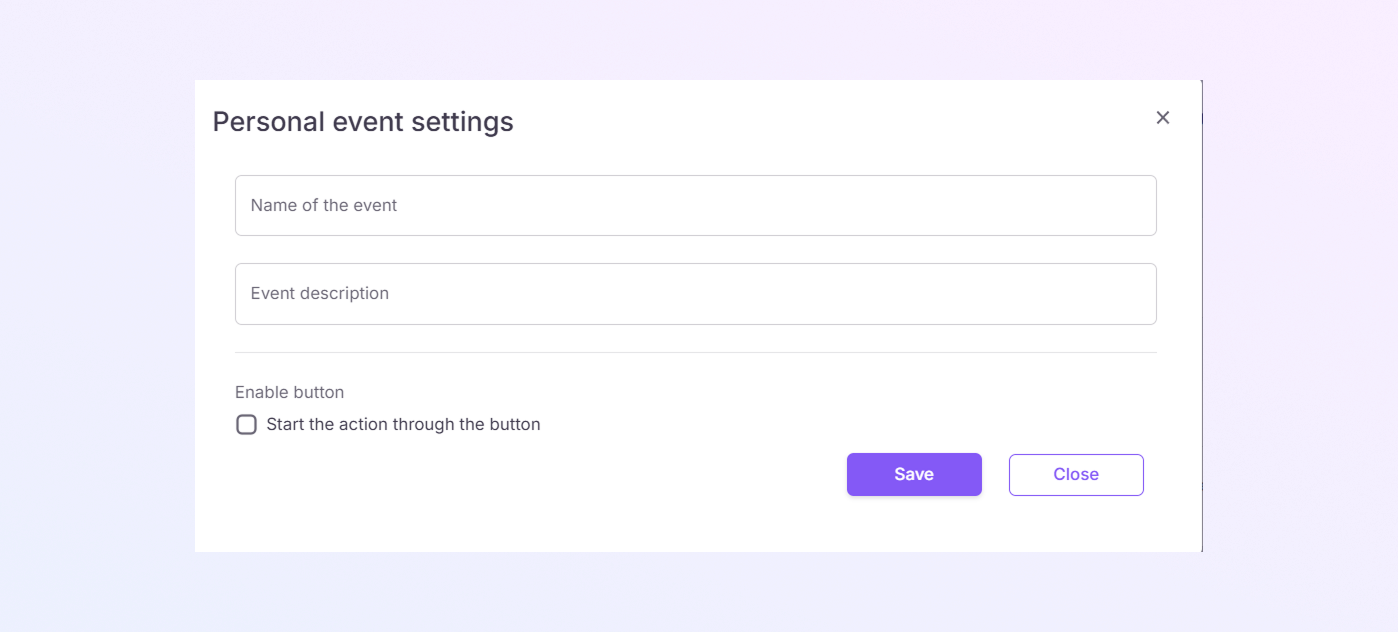
When you add a new personal event, you can configure it in a few simple steps:
-
Click the + Add Personal Event Button (located in the top-right corner).
-
Set the Event Name: Give your event a name that describes what it will trigger, such as “Order Reserved.”
-
Add an Event Description: Optionally, you can add a description for more details about the event.
-
Enable Button: If you want this event to be triggered by a button, check the box for Start the action through the button.
When finished, click Save to save your new personal event.
Setting Up the Personal Event Button
-
If you enable a button, it will appear on your order card and in the list of orders.
-
Clicking this button will trigger the automatic actions associated with this personal event.
-
You can configure the icon, name, and color of the button to make it easily identifiable.
How to Use Personal Events in Your Workflow
-
Using Buttons
-
When you create a personal event with a button, it will appear on the order card and in the list of orders under the Actions button.
-
Clicking this button will automatically trigger the actions you have configured for this personal event.
-
-
Using Keyboard Shortcuts
-
You can assign a keyboard shortcut (e.g., Alt + 1) to trigger the event.
-
While on the order card, pressing the shortcut key will trigger the associated actions for the selected orders.
-
-
Using Barcodes
-
You can create a barcode associated with the personal event.
-
Scanning the barcode while on the order card will trigger the actions for the selected order.
-