

ExactFlow Add Product Page User Guide
You add all the information about a new product to your store on the Add Product page. Each tab collects different kinds of data. You may move between them at any time.
How to Open the Add Product form
-
Click Products, then go to the Product List from the left sidebar
-
Click Add Product (the purple button in the top-right corner) on the Product List page.
-
When the Add Product window opens, the tabs for Product, Sales and Warehouse, Information, Photos, and Variants appear at the top.
-
Product Tab
-
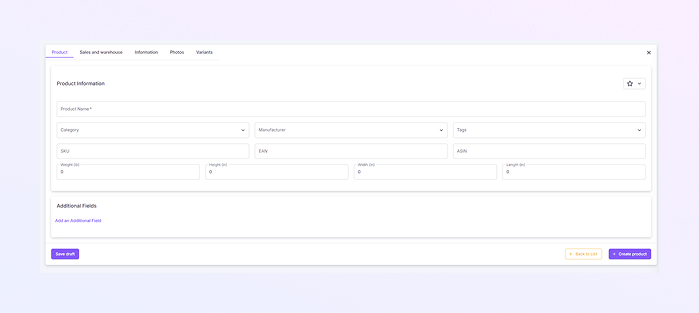
Enter the product title (required) in Product Name*.
-
From the dropdown menu, select a category (optional but recommended).
-
If the manufacturer is available, fill it.
-
To help in future searches and filtering, add tags.
-
Add a unique SKU (Stock Keeping Unit).
-
If your product has barcodes, include the EAN or ASIN.
-
If you require shipping calculations, enter weight, height, width, and length (optional).
-
To create unique fields that your team uses, click an Additional Field (optional).
-
After completing this tab, you can either:
-
Click the Sales and Warehouse tab to proceed, or
-
Click Save draft (bottom-left) to save and proceed at a later time.
-
Tip: To avoid duplication, use a unique Serial Number (SN) and a clear product name.
-
-
Sales and Warehouse Tab
-
Fill prices:
-
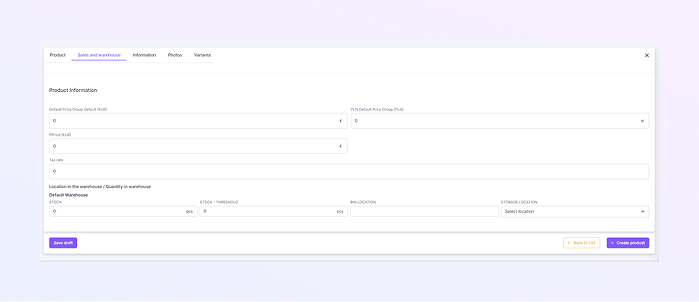
Enter the sale price in EUR for the Default Price Group (EUR).
-
PLN Default Price Group (PLN): If applicable, enter the price in PLN.
-
Price (EUR): If necessary, enter the purchase or cost price.
-
Tax rate: If applicable, enter a percentage.
Note: The Default price field will always appear. The other ones appear only if we have multiple price groups configured in the Settings of Products.
-
-
Warehouse & stock:
-
Set Stock (the number of units you have) under your Default Warehouse.
-
Establish the stock threshold, which is the lowest amount that triggers low stock levels.
-
Fill Bin Location (shelf/bin) if you track warehouse slots.
-
If you use zones, select Storage Location from the drop-down menu.
-
Save draft or go to the next tab.
Tip: If you use multiple warehouses or price groups, set them here to keep sync accurate.
-
-
-
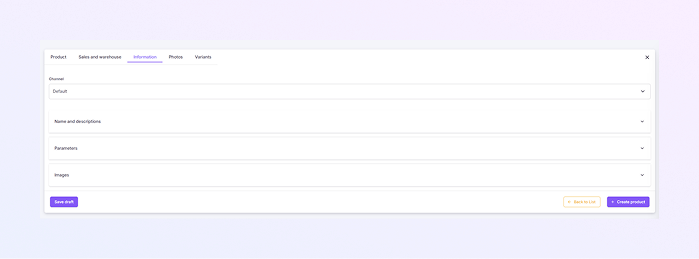
Information Tab
-
Select a Channel (Default is usually acceptable).
-
Add the product name, description, and extra description after expanding the Name and Description fields.
-
To add parameter names and values by expanding the Parameters section.
-
Add parameters from parameter groups as well. To add several related parameters at once, choose parameter groups.
-
To attach images, use the Images section.
-
Save the draft or move to the Photos tab.
Tip: Use bullet lists and clear product descriptions to improve marketplace listings.
-
-
Photos Tab
-
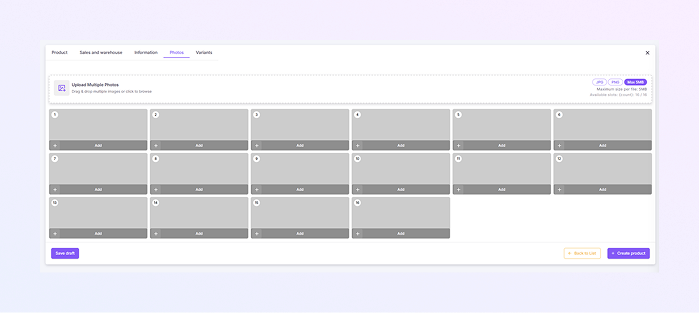
You can either drag and drop your photos or click the Upload Multiple Photos section. Also, you can upload multiple photos at once by hovering over the photo.
-
You can edit or delete the uploaded photos.
-
File formats supported are JPG and PNG. Each file is limited to 5 MB.
-
Upload the main image (slot 1) first; you have up to 16 slots.
-
Images can be rearranged or removed after upload if needed.
-
Save draft or continue to Variants.
Tip: Use high-quality, clean images. The main image should show the product clearly.
-
-
Variants Tab
-
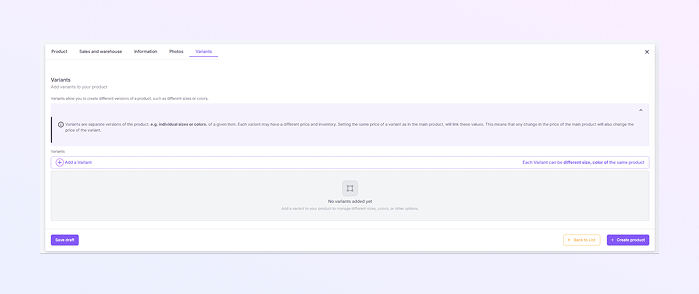
Read the variants information box (each variant can have its own price and stock).
-
To add a variant, click +.
-
For each variant set, add the variant name, SKU, EAN, warehouse, and price group.
-
The Variant Name is mandatory while adding.
-
Save draft or finish.
-
-
Finalize product
-
Complete the process and check all the tabs (Product → Sales and Warehouse → Information → Photos → Variants) to make sure the data is accurate.
-
Click Save draft, if you want to come back later.
-
To publish the product, click Create product (bottom-right).
-
To cancel and return to the list, click Back to List.
-