

ExactFlow Categories Page User Guide
The Categories page helps you organize your products into groups. Categories make it easier to manage inventory, search products, and keep your store structured. For example: Electronics, Home & Office Accessories, and Gift Cards.
You can also create sub-categories under a main category. This guide explains the Categories page in the ExactFlow Product module.
-
Log in to ExactFlow
-
From the left sidebar, click Products
-
Click Settings → Open Categories.
-
Categories List Page
-
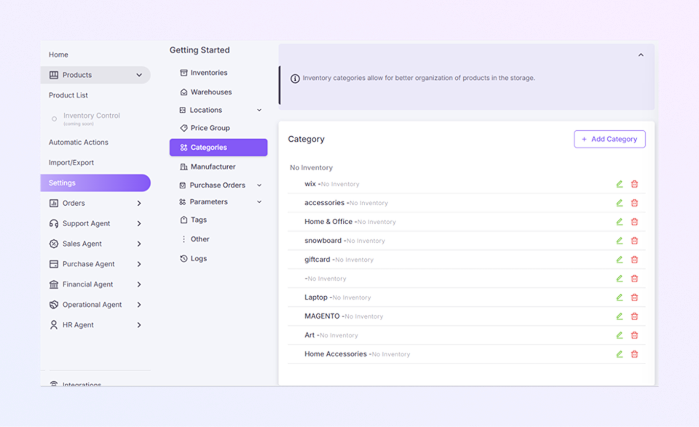
This list shows all existing categories.
-
Each category displays:
-
Category name
-
Inventory status (Inventory / No Inventory)
-
-
Categories are shown in a simple list view.
-
There are two Action Icons:
-
Edit icon: Edit the category details.
-
Delete icon: Remove the category (if not in use).
-
-
You should only delete a category if it is not assigned to any product.
-
-
Add a New Category
-
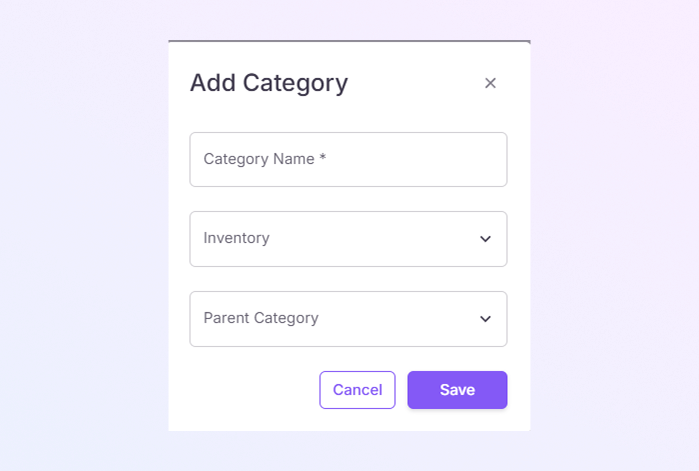
On the Categories page, click + Add Category (top-right). A pop-up window, Add Category will open.
-
Enter a clear and meaningful Category Name. Example: Home Accessories, Electronics, Laptop. This field is required.
-
Select Inventory to define whether products in this category will track stock levels.
-
Inventory: Product quantity is tracked and automatically updates when items are sold or restocked.
-
No Inventory: Stock quantity is not tracked (ideal for services, digital items, or gift cards).
-
-
In Parent Category (Optional), use this field to create sub-categories. Select an existing category as the parent. Example: Parent Category: Electronics → New Category: Laptops. This will place Laptops under Electronics.
-
Click Save to create the category or click Cancel to close without saving.
-
How to Open the Categories Pagee
You will now see the Categories list page.